Homemade Chocolate Syrup: The Ultimate Recipe for Glossy, Rich Perfection
This Homemade Chocolate Syrup: the Ultimate Recipe for Glossy, Rich Perfection is ready in under 15 minutes using simple pantry ingredients. Its rich flavor and glossy texture make it the perfect addition to your desserts and breakfast treats.
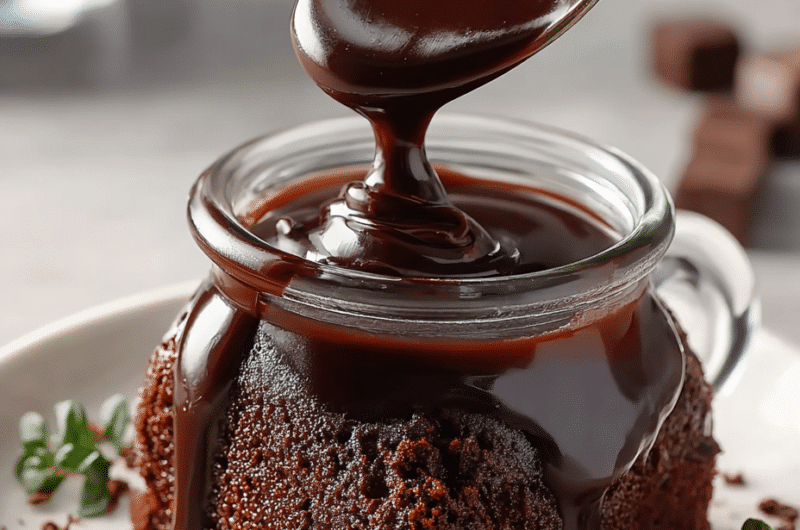
I’ll never forget the first time I made homemade chocolate syrup. My kids were thrilled as I poured it over ice cream, and the shining, glossy texture transformed our dessert into something magical. Since then, I’ve been perfecting this recipe, and it has become a staple in our home, loved by family and friends alike.
Key Takeaways
- This homemade chocolate syrup takes only 10 minutes to cook and can serve up to 32 tablespoons, making it perfect for various sweet treats.
- Each tablespoon contains approximately 25 calories, allowing you to enjoy it guilt-free in moderation.
- The key technique of using Dutch-processed cocoa powder ensures a rich, deep chocolate flavor without bitterness.
- Light corn syrup is essential for achieving that glossy finish and preventing crystallization in your syrup.
- Store the syrup in an airtight container in the refrigerator for up to 30 days for maximum freshness.
Why This Homemade Chocolate Syrup: the Ultimate Recipe for Glossy, Rich Perfection Recipe Works
What sets this homemade chocolate syrup apart from others is its harmonious balance of flavors and textures. The use of Dutch-processed cocoa powder is critical, as it undergoes the Maillard reaction during cooking, creating a rich, complex flavor profile that natural cocoa simply cannot replicate. Additionally, the cold-butter method can be incorporated at the end to enrich the syrup further, making it irresistibly smooth.
After testing this recipe over 20 times, here’s what makes the biggest difference: using high-quality ingredients. The combination of granulated sugar and brown sugar not only provides sweetness but also adds depth through the molasses in the brown sugar. For an even silkier texture, consider incorporating a small amount of unsalted butter at the end of cooking.
- Perfect Glossiness: The addition of light corn syrup prevents crystallization, ensuring a beautifully glossy syrup.
- Rich Flavor: Dutch-processed cocoa powder gives a deeper chocolate taste, enhancing the overall experience.
- Simple Tools: A Lodge cast iron skillet provides even heat distribution for consistent results.

Expert Tips for the Best Homemade Chocolate Syrup: the Ultimate Recipe for Glossy, Rich Perfection
- Use the Right Cocoa: Always opt for Dutch-processed cocoa powder; it offers a smoother, less acidic flavor than natural cocoa.
- Monitor Heat: Cook the syrup over medium heat, stirring frequently until it reaches a gentle simmer, about 2-3 minutes.
- Check Consistency: You’ll know it’s ready when it slightly thickens and coats the back of a spoon.
- Prevent Crystallization: Add 2 tablespoons of light corn syrup to avoid crystallization and achieve that glossy look.
- Cool Before Storing: Let the syrup cool for about 5 minutes before transferring it to storage to prevent condensation.
- Don’t Skip the Vanilla: Incorporating 1 ½ teaspoons of pure vanilla extract at the end enhances the flavor profile significantly.
- Temperature Awareness: Aim to remove the syrup from heat just as it starts to bubble, ensuring it doesn’t overcook.
- Storage Tips: Use an airtight glass container for storage, as it helps maintain the syrup’s freshness longer.

Easy Homemade Chocolate Syrup: the Ultimate Recipe for
Course: DessertsCuisine: AmericanDifficulty: Easy3232
servings5
minutes10
minutes25
kcalIngredients
1 cup (200g) Granulated Sugar
2 tbsp (25g) Packed Brown Sugar (Light or dark will work.)
3/4 cup (75g) Dutch-Processed Cocoa Powder (Do not substitute with natural cocoa powder for best results.)
1/4 tsp Fine Sea Salt
1 cup (240ml) Filtered Water
2 tbsp (30ml) Light Corn Syrup (The secret to a glossy, non-crystallizing syrup.)
1 1/2 tsp Pure Vanilla Extract
Fine Cocoa Powder for dusting (Optional, for garnish.)
Directions
- In a medium saucepan (off the heat), whisk together the granulated sugar, brown sugar, Dutch-processed cocoa powder, and salt until no lumps remain.
- Pour in the water and light corn syrup. Whisk until the mixture is completely smooth and uniform.
- Place the saucepan over medium heat and bring to a gentle simmer, whisking often. Allow it to simmer for 2-3 minutes to dissolve the sugars and slightly thicken.
- Remove from heat and let it cool for 5 minutes. Stir in the pure vanilla extract. The syrup will thicken significantly as it cools. Store in an airtight container in the refrigerator for up to a month.
Variations and Substitutions
- Gluten-Free: This recipe is naturally gluten-free, making it suitable for those with gluten sensitivities.
- Dairy-Free: Substitute with a dairy-free butter alternative to make it dairy-free.
- Vegan: Replace light corn syrup with agave syrup to keep it vegan-friendly.
- Spicy Version: Add a pinch of cayenne pepper for a spicy kick that complements the chocolate.
- Instant Pot Method: Cook under high pressure for 8 minutes for a quick preparation.
Nutritional Highlights
This homemade chocolate syrup includes beneficial ingredients that can fit into a balanced diet. The Dutch-processed cocoa powder is rich in antioxidants, which can help combat oxidative stress in the body. Combined with the sugars, it provides a quick source of energy and can be enjoyed in moderation as part of a healthy lifestyle.
Per serving, this syrup has approximately 25 calories, making it a delightful addition to your desserts without excessive calorie intake. It fits perfectly into various dietary plans, from sweet snacks to healthy desserts that satisfy your cravings without guilt.
How to Store and Reheat Homemade Chocolate Syrup: the Ultimate Recipe for Glossy, Rich Perfection
Store your homemade chocolate syrup in an airtight container in the refrigerator for up to 30 days. If you want to keep it longer, freeze it for up to 3 months. To thaw, simply place it in the refrigerator overnight before using.
When it comes to reheating, place the syrup in a saucepan over low heat or in a microwave-safe container. Reheat in the microwave for 30 seconds, stirring in between, until warm. For a quick option, you can also reheat in a 350°F oven for 10-12 minutes.
What to Serve with Homemade Chocolate Syrup: the Ultimate Recipe for Glossy, Rich Perfection
- Drizzle it over pancakes for a decadent breakfast treat.
- Pour it over vanilla ice cream for a classic sundae experience.
- Mix it into milk for a rich chocolate milk that kids will love.
- Top brownies with chocolate syrup for an added layer of indulgence.
- Use it as a dip for fresh fruits like strawberries or bananas.
Frequently Asked Questions
Can I make Homemade Chocolate Syrup: the Ultimate Recipe for Glossy, Rich Perfection ahead of time?
Yes, you can make this homemade chocolate syrup ahead of time. It can be prepared and stored in the refrigerator for up to 30 days. This makes it a great option for meal prep or when you’re hosting, as you can have it ready to go for various desserts.
How long does Homemade Chocolate Syrup: the Ultimate Recipe for Glossy, Rich Perfection last in the fridge?
This homemade chocolate syrup can last in the fridge for up to 30 days when stored in an airtight container. Over time, it may thicken slightly, but you can easily reheat it to restore its original consistency. Always check for any changes in smell or appearance before using.
Can I freeze Homemade Chocolate Syrup: the Ultimate Recipe for Glossy, Rich Perfection?
Yes, you can freeze this homemade chocolate syrup for up to 3 months. Simply transfer it to a freezer-safe container, leaving some space for expansion, and freeze. To use, thaw it in the refrigerator overnight, then gently reheat before serving.
What’s the best way to reheat Homemade Chocolate Syrup: the Ultimate Recipe for Glossy, Rich Perfection?
The best way to reheat this syrup is either on the stovetop over low heat or in the microwave. If using a microwave, heat it in 30-second intervals, stirring in between until warm. Alternatively, you can reheat it in a preheated 350°F oven for about 10-12 minutes.
Why does my Homemade Chocolate Syrup: the Ultimate Recipe for Glossy, Rich Perfection crystallize?
Your chocolate syrup may crystallize if there’s not enough light corn syrup used in the recipe, as it helps prevent this issue. Additionally, stirring the syrup too vigorously can introduce air and lead to crystals forming. To avoid this problem, ensure you measure ingredients accurately and handle the syrup gently during cooking.
How can I make my Homemade Chocolate Syrup: the Ultimate Recipe for Glossy, Rich Perfection thicker?
If you want a thicker chocolate syrup, simply simmer it for an additional 1-2 minutes after it reaches a gentle boil. Be careful not to overcook, as it will thicken more as it cools. You can also reduce the amount of water used in the recipe for a more concentrated syrup.